I. – Getting Started
II. – Tier One Plans
III. – Early Warning System
IV. – Moving Between Tiers
VI. - SEL
VII. – 504 Plans
Appendix A. – Guided Plans
Appendix B. – Support Documents
Appendix C. – Video Support
Appendix D. - Frequently Asked Questions
- FAQs
Appendix E. – MTSS Glossary of Terms
Early Warning System
Accessing the EWS
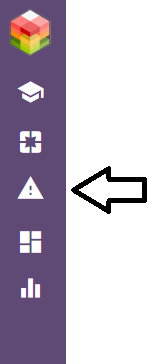
Access the EWS from the home screen by clicking in the icon on the side tool bar:
EWS District Settings
lect the “District Settings” tab at the top of the EWS screen:

From this screen, district moderators can change settings according to school type (elementary, middle, or high school) and by quarter and grade level.

– District moderators set the date ranges for each quarter to align with the district calendar.
– EWS indicators are listed in table 2 in the left column.
– Default fields are set in RtI:Stored! according to nationally normed data.
– Custom fields are available for districts that elect to use different norms.
– After editing these settings, click “SAVE” at the bottom of the screen.
EWS Level Summary Chart
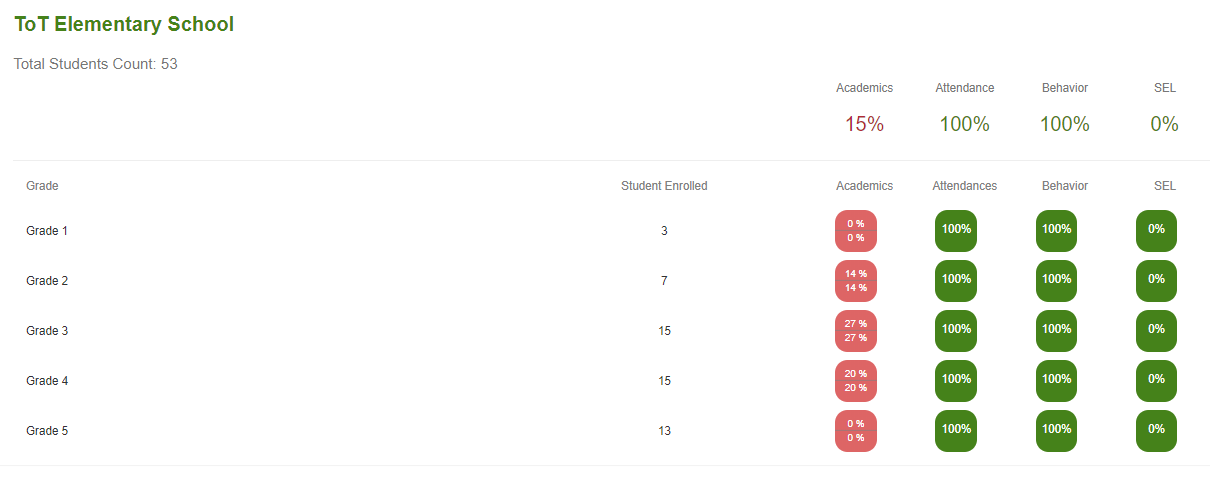
A summary of students identified at each level in the EWS can be found in the summary table on the EWS main screen: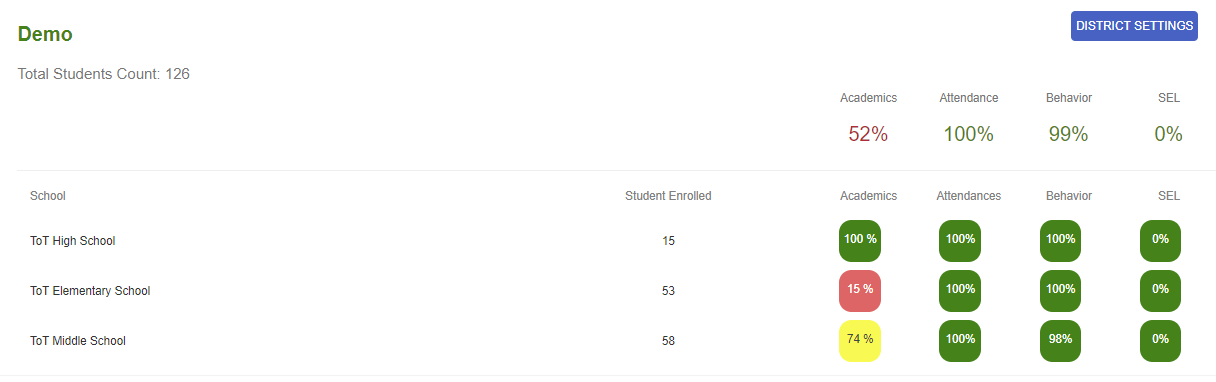
Filter this summary table to the approrpiate school(s) to view percentages of students identified at each level.
Filter to individual students.
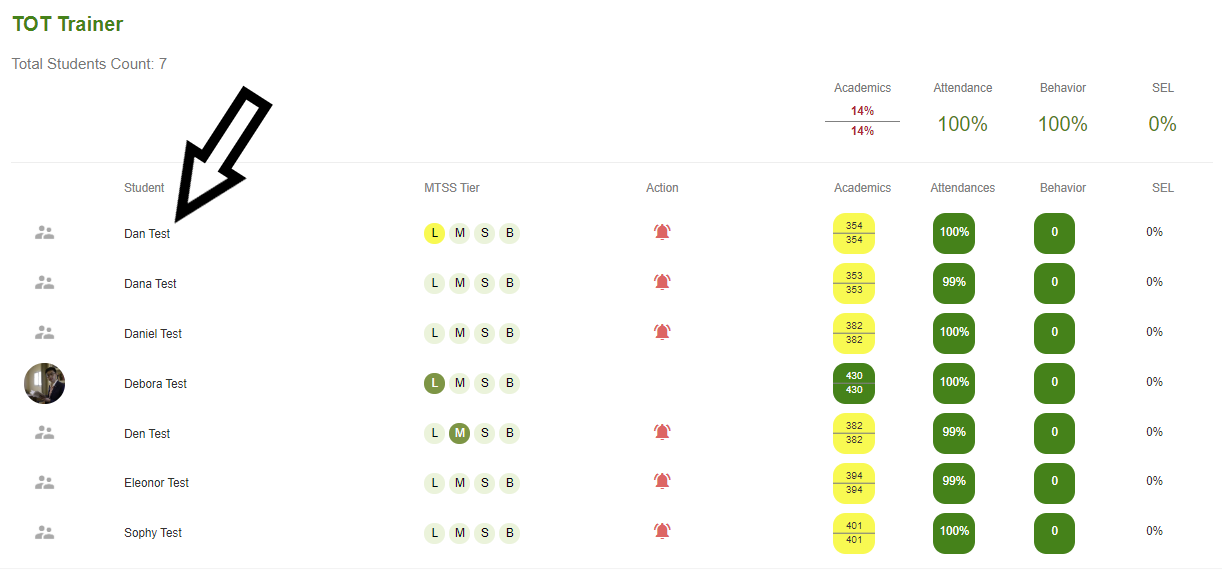
Levels indicate the number of risk indicators students have (0, 1, 2, or 3) by indicator (attendance, course grades/averages, behavior incidences).
Color Coded Levels
From the summary screen, you can quickly identify risk levels according to the color-coded system.
Light Green: 0 risk indicators
Dark Green: 1 risk indicator
Yellow: 2 risk indicators
Red: 3 risk indicators
EWS Decisions: Accept – Deny – Ignore
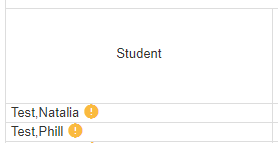
circled exclamation point beside a student’s name indicates the need for attention, based on risk indicators:
After clicking on the cell, the team will receive the following prompt:
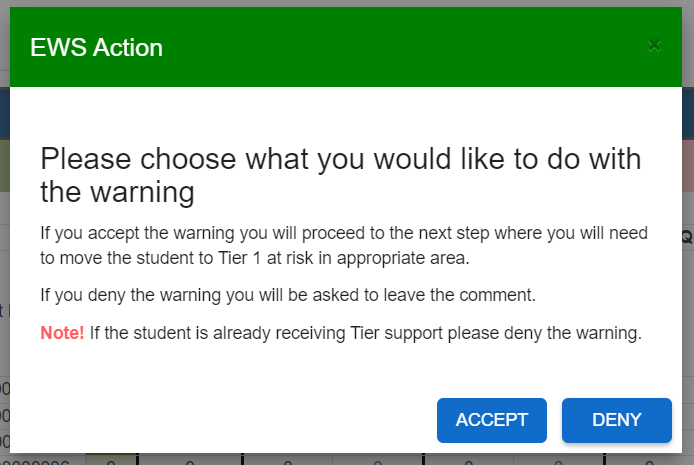
Accept the Risk
Click “Accept” and the team will be prompted to select the area of concern they would like the student to be identified at-risk for.
The team should use the information from the EWS to determine which area(s) the student should be identified in.
For example: If risk indicators are present due to behavior incidences, the student could be identified at-risk in behavior. If course grades are the area indicated in the EWS, the team should select the specific area of concern (mathematics or literacy).
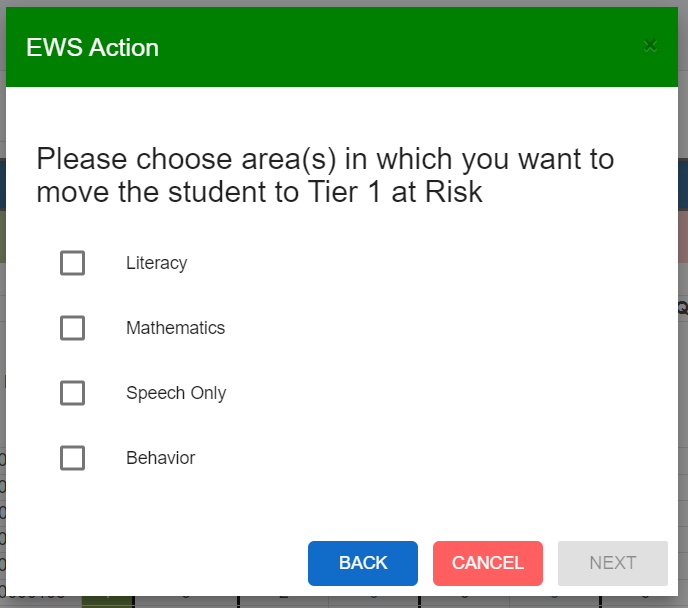
Click on the area of concern.
This will move the student to Tier 1 At-Risk for the identified area.
Follow the directions for individual students identified as Tier 1 At-Risk in the Moving Between Tiered section of this Success Guide.
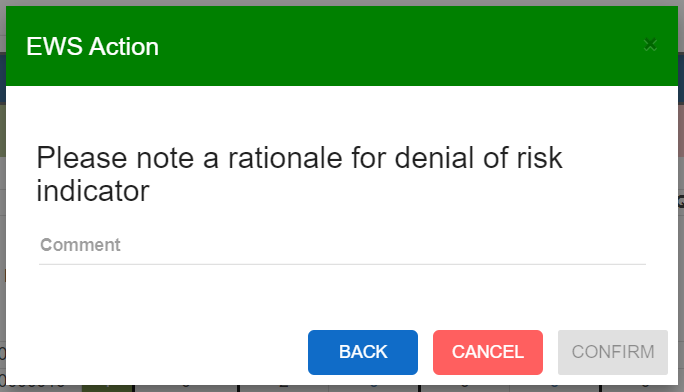
Deny the Risk
The team may determine that there is not a present concern for the student based on several criteria:
-Student is already identified as at-risk in that area
-Student is currently receiving interventions in that specific area
-Additional anecdotal information is discussed by the team
Click “Deny” and the team will be prompted to note the rationale for denial of risk indicator:
EWS Risk Report
The Risk Report provides a summary of all students identified in the EWS as having an indicated risk level and the decision that was made (if any) by the team:
Ignored
Accepted
Denied
Student Dashboard Risk Indicator
On the student dashboard, student identified as having at least one risk indicator and in need of a team decision are shown with a red exclamation point enclosed in a red triangle:
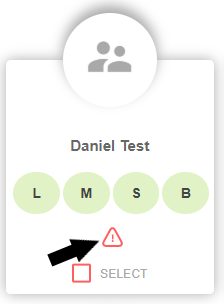
To enter the EWS and view detailed information about indicators, click on the red triangle.