I. – Getting Started
II. – Tier One Plans
III. – Early Warning System
IV. – Moving Between Tiers
VI. - SEL
VII. – 504 Plans
Appendix A. – Guided Plans
Appendix B. – Support Documents
Appendix C. – Video Support
Appendix D. - Frequently Asked Questions
- FAQs
Appendix E. – MTSS Glossary of Terms
Moving Between Tiers
Tier 1 At-Risk – Tier 2 – Tier 3
Note:
MTSS implementation must begin with Tier 1. Core instruction is the foundational support students receive. For this reason, Tier 1: Differentiated Core Plans must be created before any student can receive additional supports in the platform.
*For support with Tier 1: Differentiated Core Plans, see section 2 of this Success Guide.
Reminders:
– All decisions should be made by a PLC team, using multiple data sources.
– Student’s data files should be updated at least one time per month.
– Grey decision boxes indicate that there is missing data/documentation.
Tier 1 At-Risk
Tier 1 At-Risk means that teams have identified a student who may be at-risk, based on specific criteria.
– Students identified as Tier 1 At-Risk do not necessarily receive instruction in addition to core.
– Acceptance of EWS risk indicators will move students to Tier 1 At-Risk
– Students must be identified as Tier 1 At-Risk prior to moving to Tier 2 or Tier 3

Making the Move to Tier 1 At-Risk
Filter the Student Dashboard to the appropriate school and grade.
Click in the white box(es) under student name(s) for all students the team has determined should be moved to Tier 1 At-Risk.
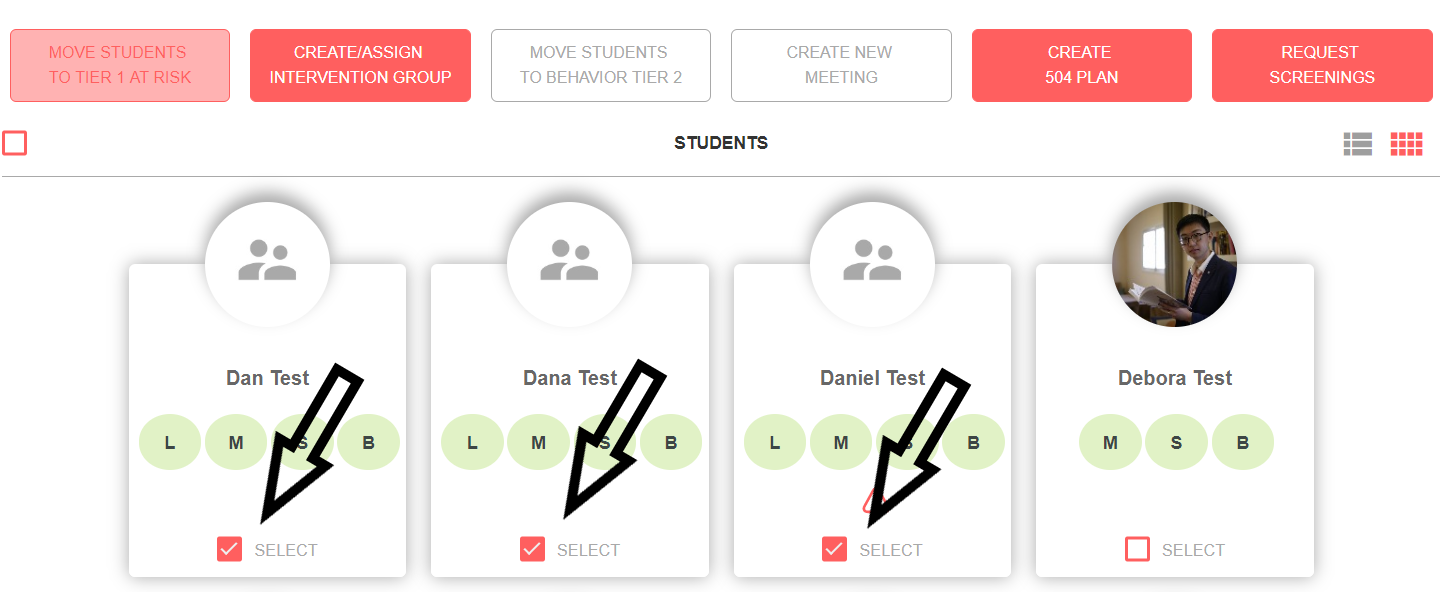
Click the red “Move Students to Tier 1 At-Risk” button.
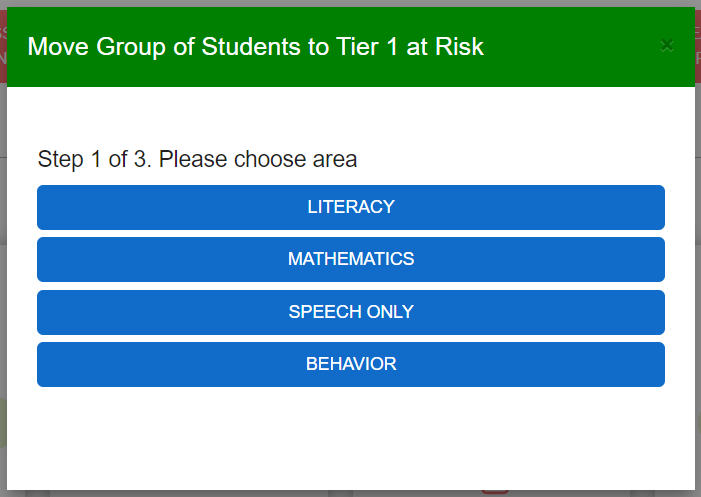
Select the primary area of concern (Literacy, Mathematics, Behavior, Speech ONLY):
Documentation Reminders
- Universal Screeners-Contain overall class/grade level data for determining mastery of skills
- Universal Assessments-Contain overall class/grade level data for determining mastery of grade level content/standards
- d Other Documents-This function is available at all Tiers and is located in the top right corner of the Review Document Checklist box (blue button).
Required documentation is listed in the multiple upload option box and in the Review Documents Checklist box in a student’s file.
Upload documents when moving students to Tier 1 At-Risk by following the prompts during identification.
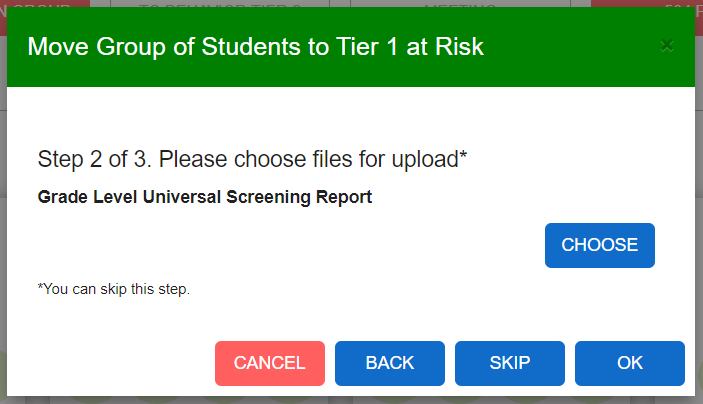
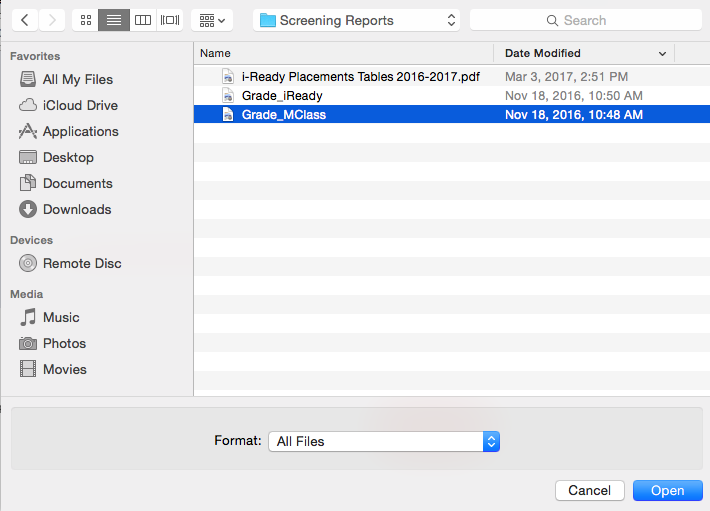
Select desired file:
Upload Documents After Initial Move
In a student’s file, scroll to the bottom and upload documents under the “Documents” tab:

You will be prompted to select the desired file from your computer’s files.
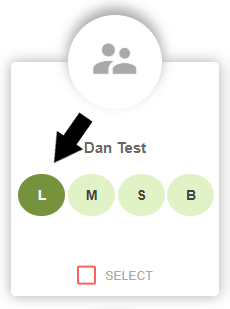
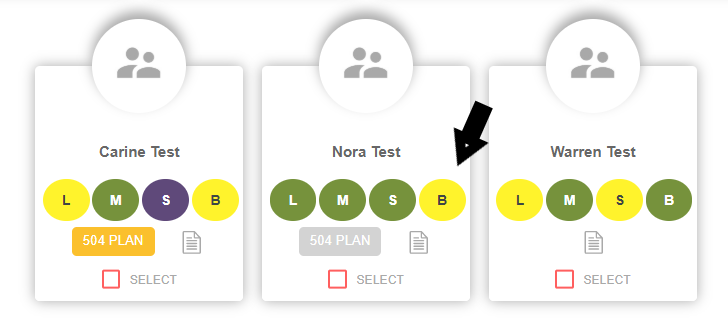
Tier 1 At-Risk Indicator
The area of concern that was identified will appear as a darker green color.
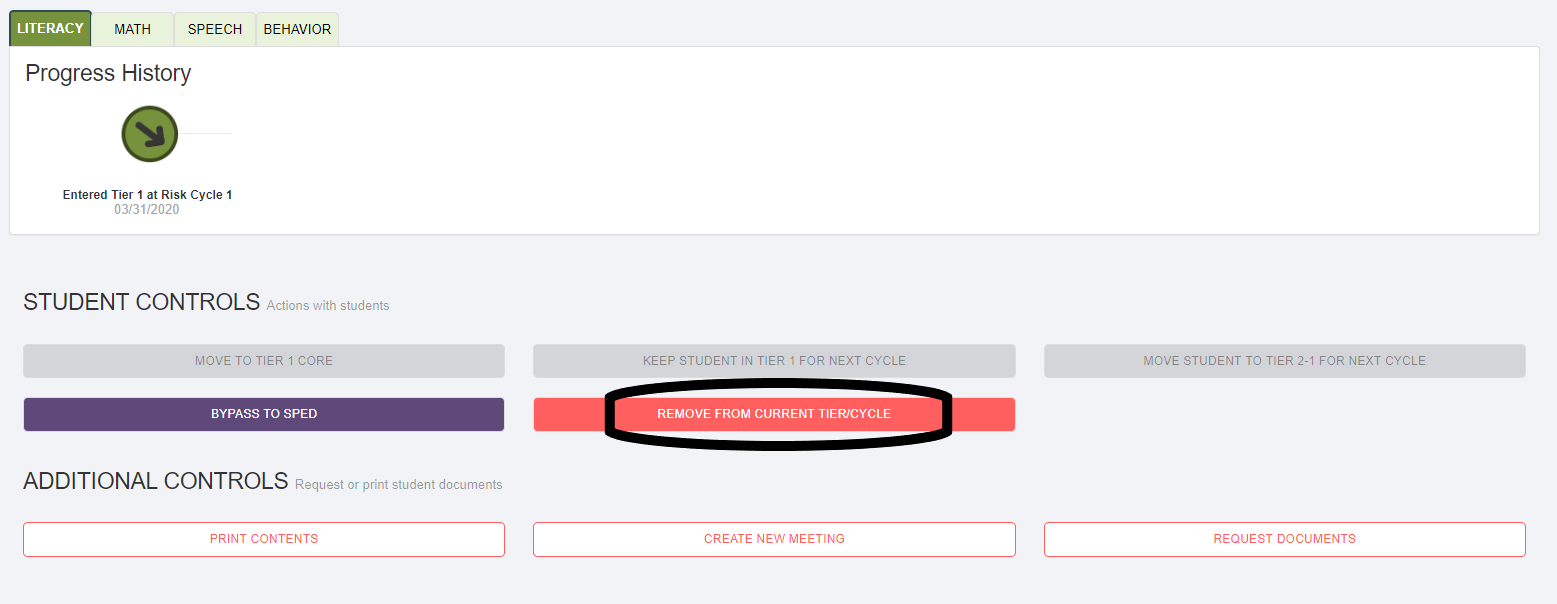
Remove Student from Tier 1 At-Risk
If a student is moved to Tier 1 At-Risk in error, he/she can be moved back to Tier 1 only.
This function requires an administrative override by a Building Administrator.
A red “Remove from Current Tier/Cycle” button is located in the student’s file:
Tier 2
Filter the Student List to the appropriate view.
Select the area of concern for the student you wish to move to tier 2.
This circle must be dark green to indicate the student is Tier 1 At-Risk. (See details above)

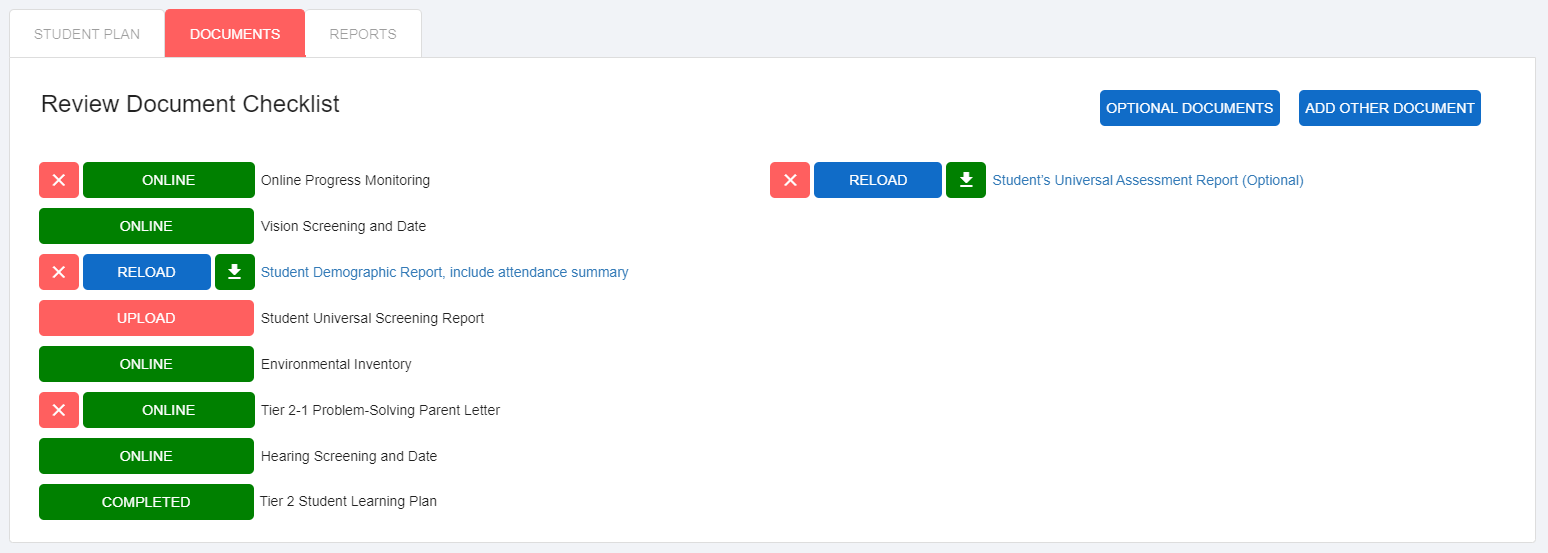
In the student’s file, scroll down to view the items in the Review Document Checklist.
If any of the items in this section have a red UPLOAD box next to the item, that report/item must be uploaded.

All documents should have green or blue boxes. If documentation is incomplete, upload accordingly before moving on.
Scroll back to the top of the screen and click on the yellow Move Student to Tier 2-1 for next cycle bar

Intervention Groups
Determine the intervention plan and measurement strategy for Tier 2 intervention groups.
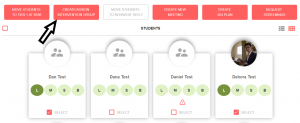
Click in the white box under the students’ names.
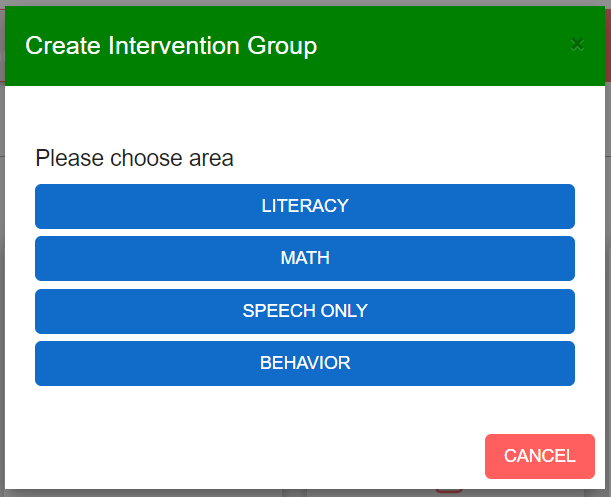
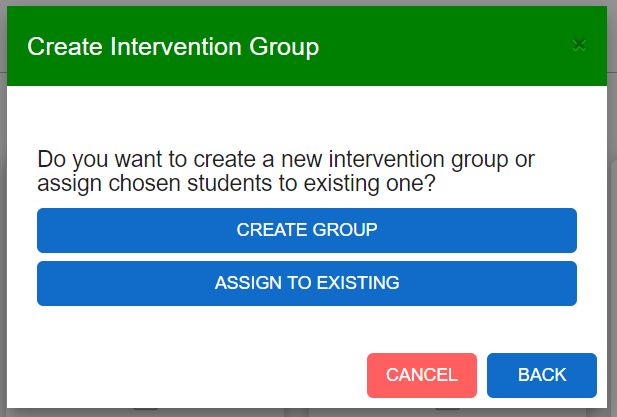
Click “Create/Assign Intervention Group”.
Follow prompts on the screen to create a new intervention group or assign student(s) to a existing intervention group.

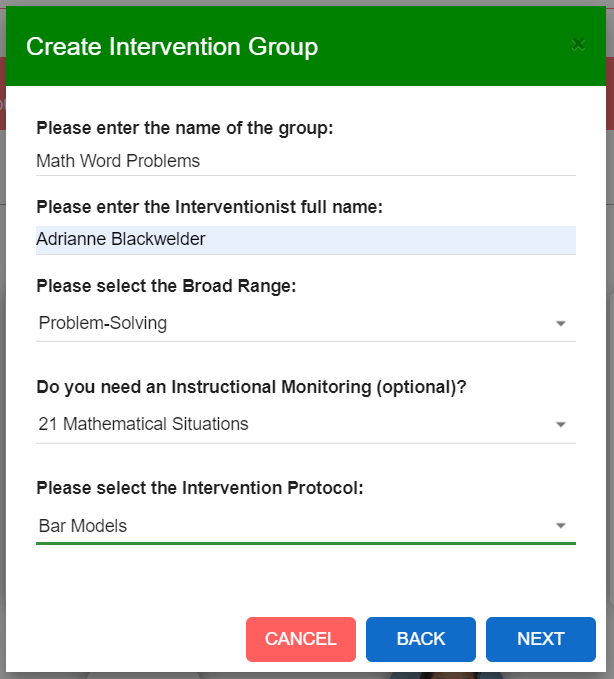
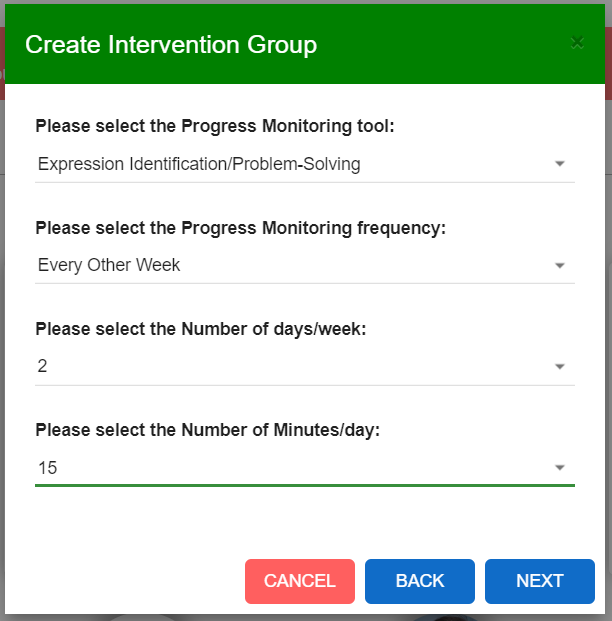

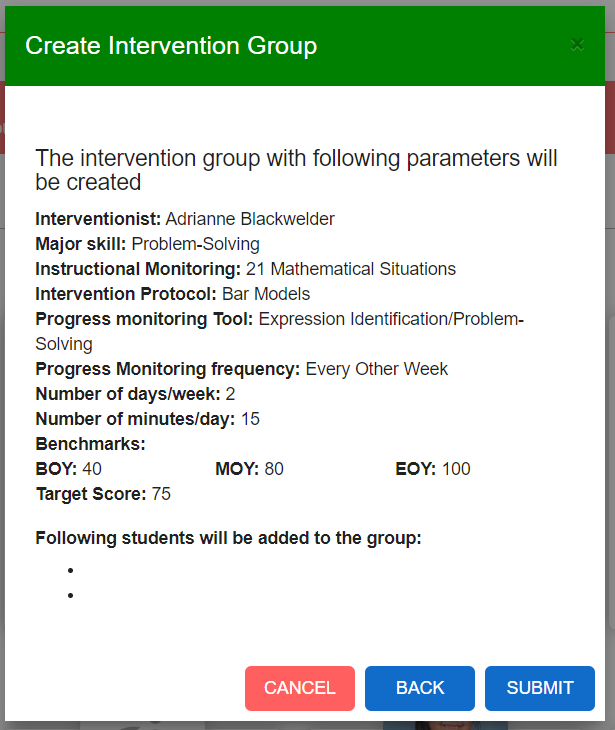
The intervention group form will generate after clicking “SUBMIT”. All information from steps 2-4 will be included.
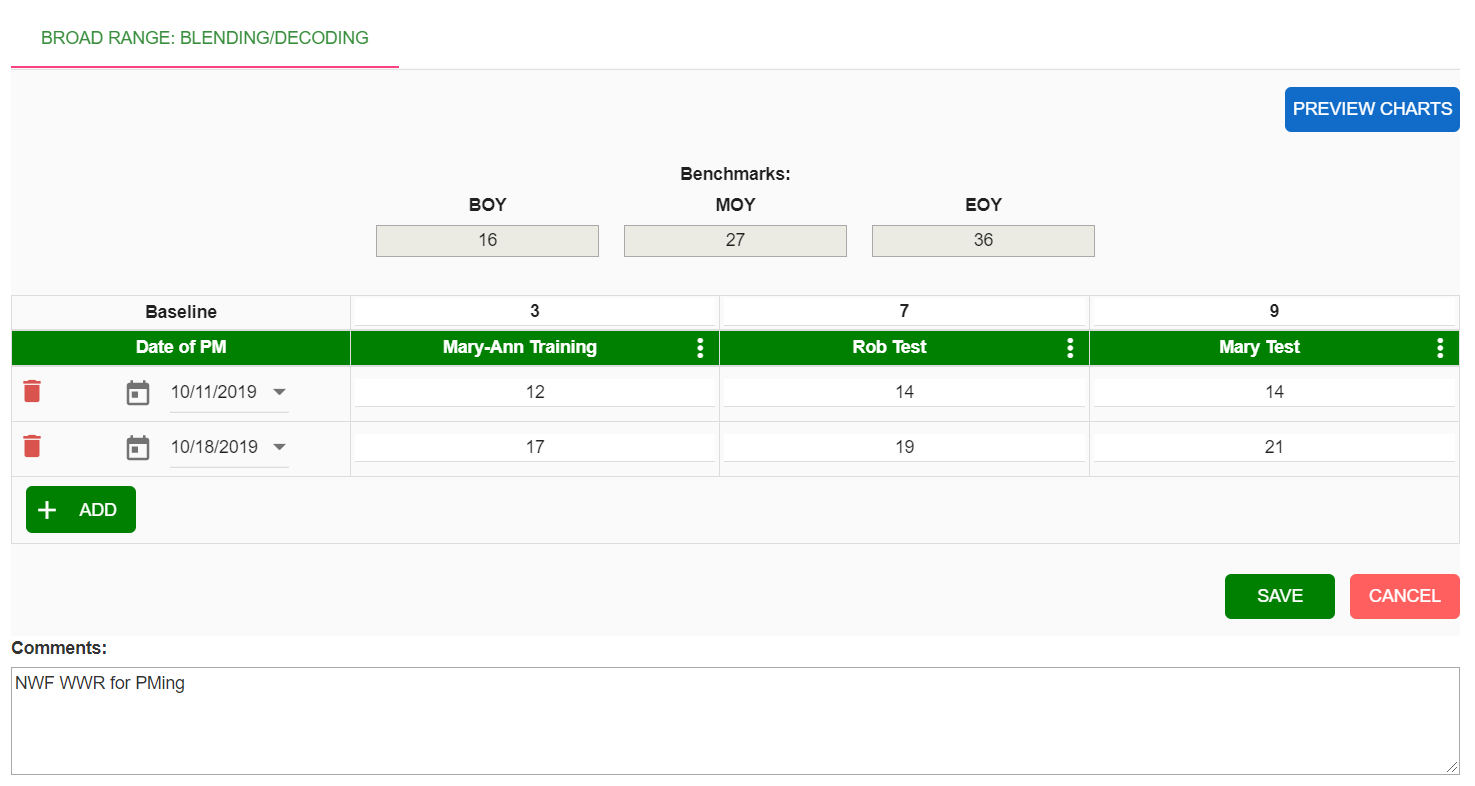
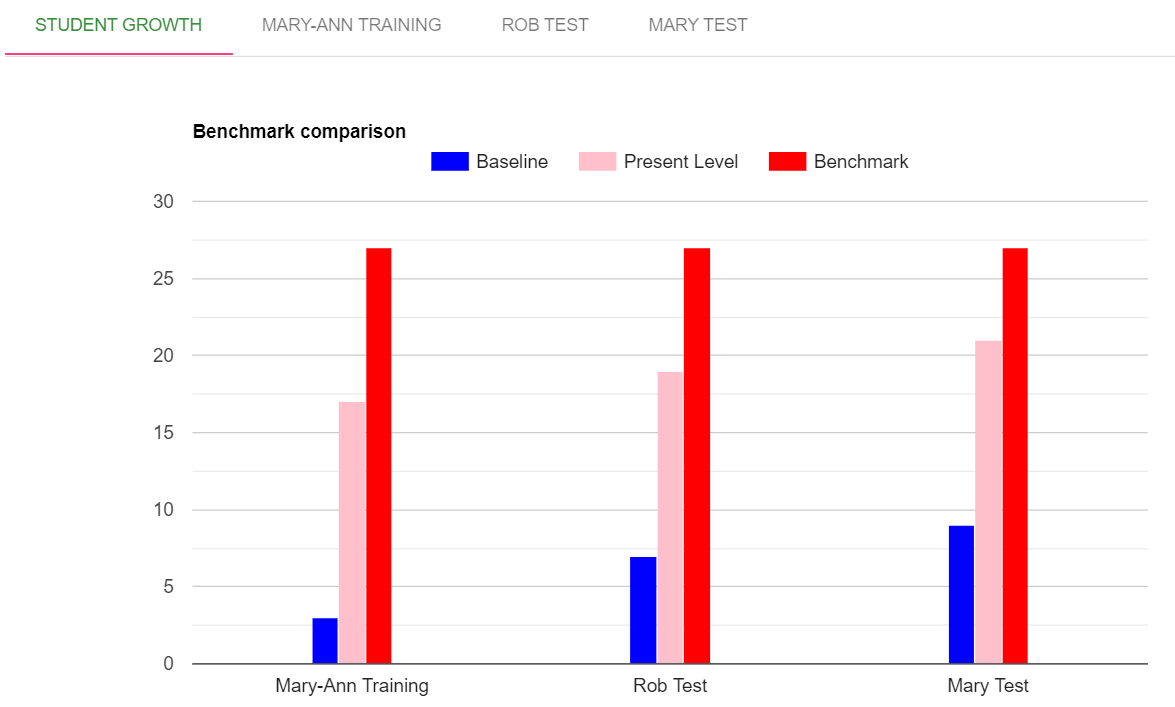
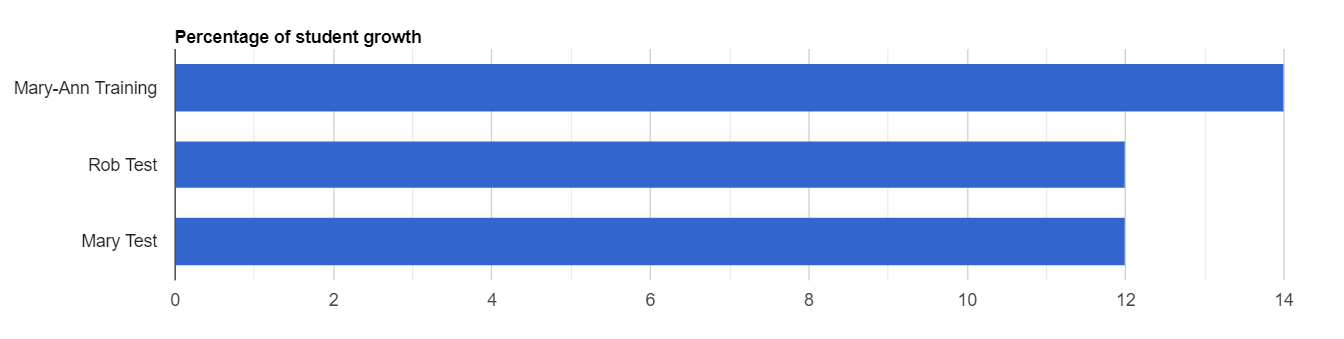
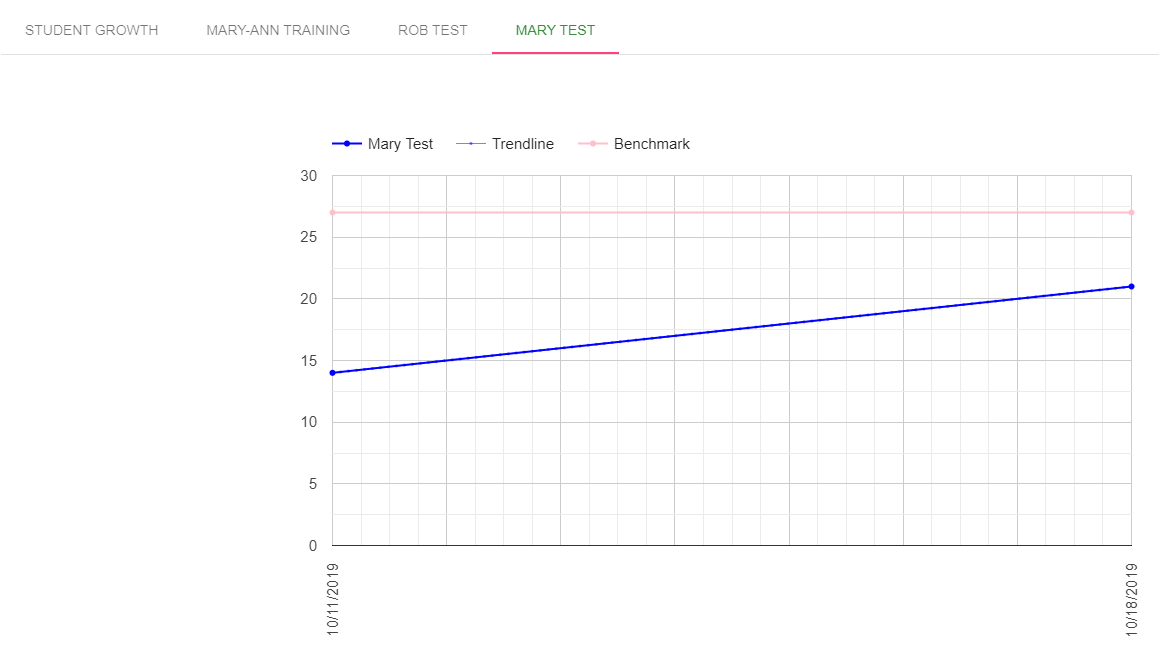
Intervention Group Charts
Click on chart feature to view students’ progress in the group.
Tier 2 Documentation
Documents should be uploaded in a student’s file under “Review Documents Checklist”. (Follow the same process described above.)
Problem-Solving Parent Letter
The Parent Letter should be printed and sent home when a student enters Tier 2.
You may opt to email this letter to parents as well. To do this, click ONLINE next to the Parent Letter item in the student’s Documents Checklist.
![]()
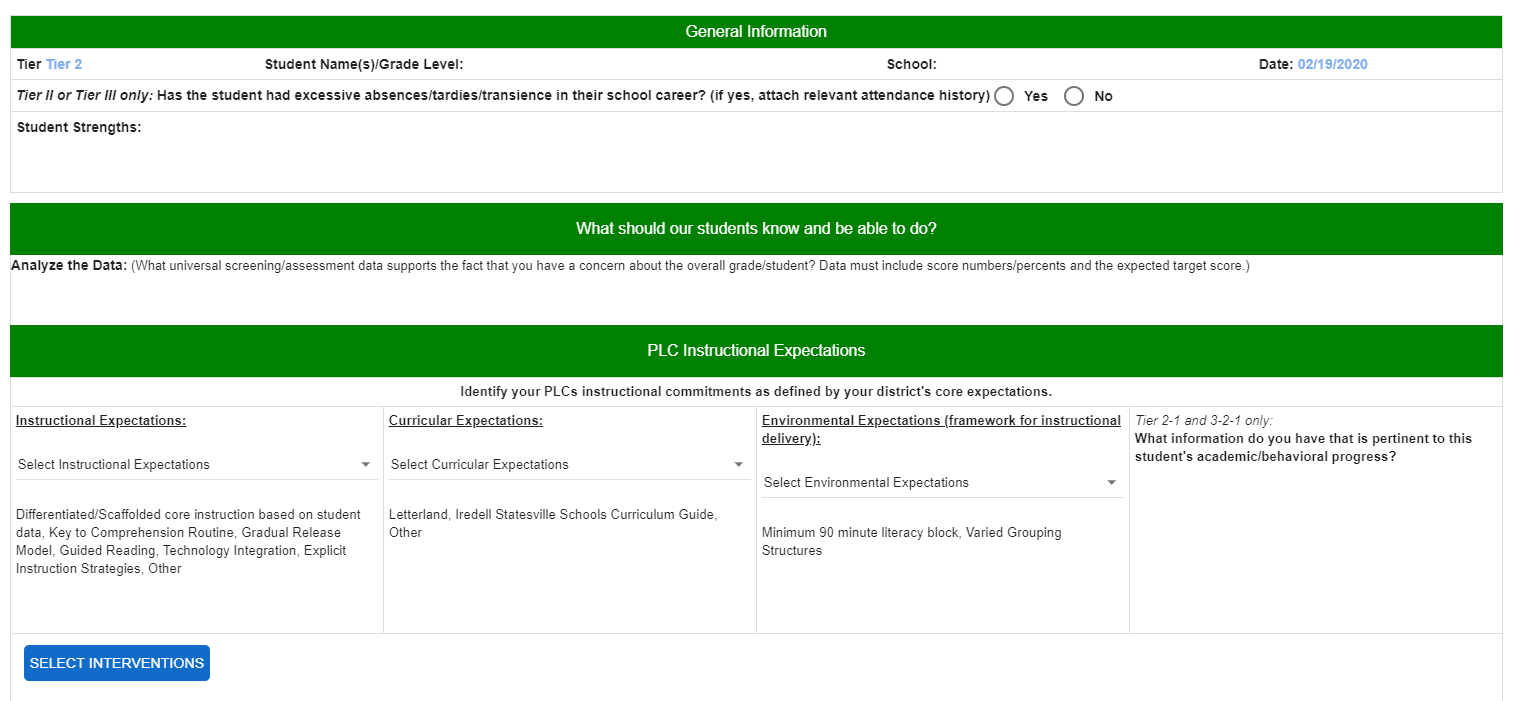
Tier 2 Student Learning Plan
or additional support, see examples in the Guided Tiered Plans section in the back of this Success Guide.
Access a student’s Tier 2 Plan in the student’s file under the “Student Plan” tab:
![]()
Edit the plan from this screen:

Enter specific data for the student in this section.
What should our students know and be able to do?
The data sources should be aligned to the data sources you analyzed for the Tier 1: Differentiated Core Instruction Plans.
Include detailed quantitative data including the screener(s)/assessments those data points are from and the goal/cut score for the student’s grade level at the specific time of year.
PLC Instructional Expectations:
Instruction, Curriculum, and Environment:
This content auto-populates from the Tier 1: Differentiated Core Instruction Plans created by grade level/department teams.
Complete box 4 in the PLC Instructional Expectations section:
- “What information do you have that is pertinent to this student’s academic or behavioral progress?

This information should include:
Everything the teacher(s) know(s) about the student as a learner
Observed successes, struggles as a learner and in specific settings – whole group, small group, partner work, independently, etc.
Home life details/events that may be pertinent to the student’s academic and/or behavioral success
Select Interventions:
A bank of researched-based strategies/interventions are available to you if you click on the blue link under the Instructional Expectation box
 These are separated by skill and provide descriptions, step-by-step directions, and/or links to templates or activities for you to use in your classrooms or intervention groups.
Click on the box by the strategies/interventions you will implement and a list will generate on the Tier 2 Student Learning Plan.
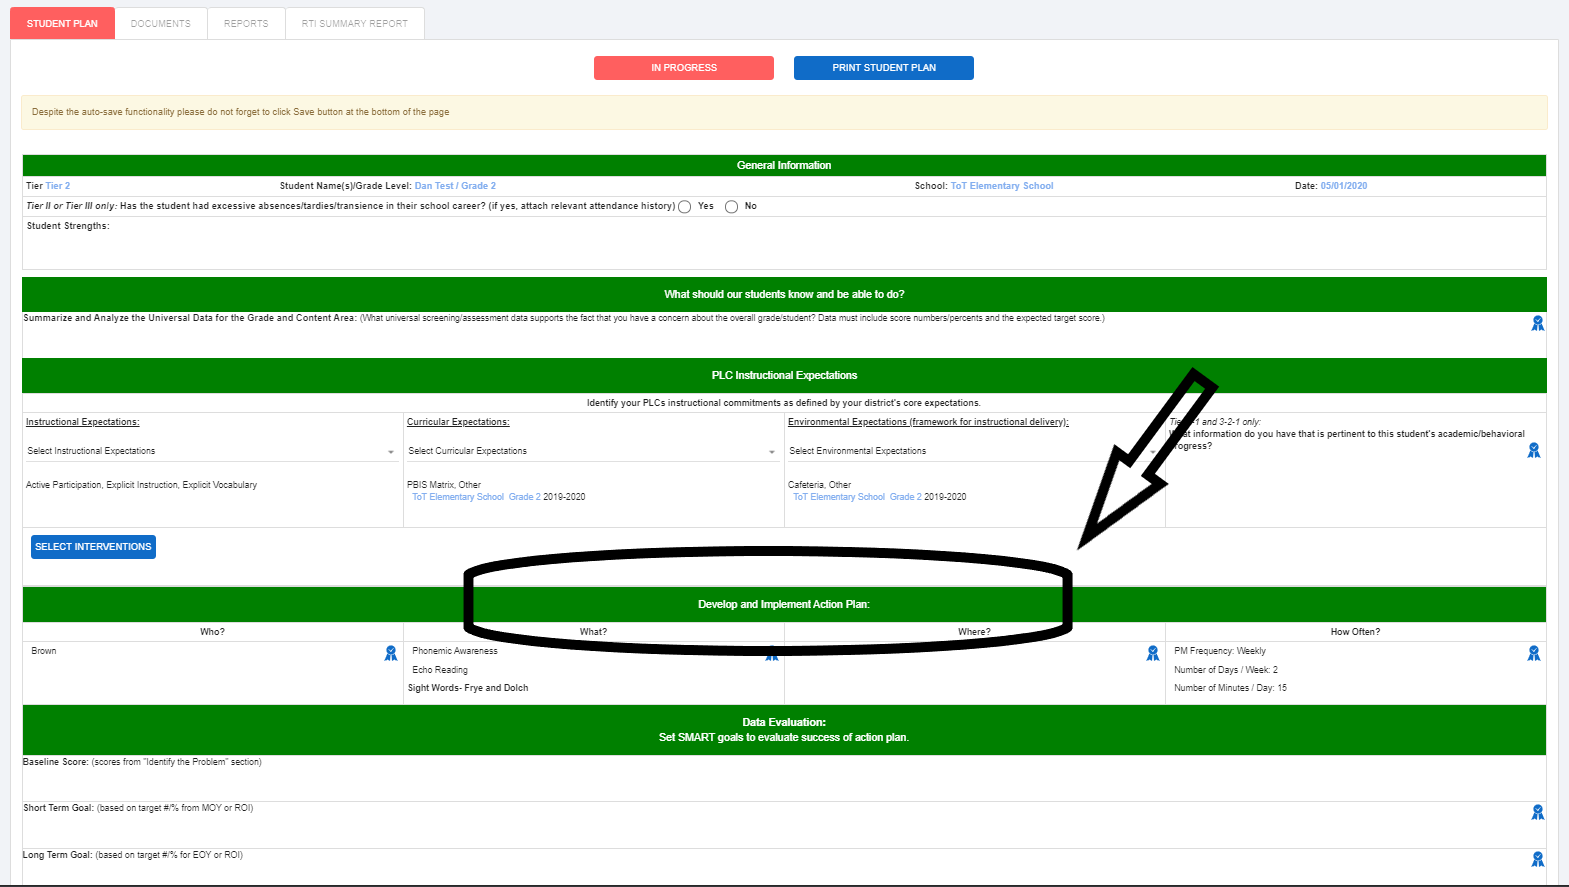
Develop and Implement Action Plan:
- Who: this is who is going to implement the strategy/intervention(s)
- What: identify the specific strategy/intervention(s)
- Where: specify location the strategy/intervention(s) will be implemented (regular classroom, intervention block, resource room, etc.)
- How Often: # of minutes/# of days per week
Data Evaluation:
Baseline Score: Number or Percent of students in the particular grade/department that did reach the expected/target cut score (this should be directly aligned to your Analyze the Data section)
Short Term Goal: Based on the universal screening or universal assessments MOY goal(s)/cut score(s) – or if the student is well below grade level – this could be based on the specific Rate of Improvement (ROI) for that student
Long Term Goal: Based on the universal screening or universal assessments EOY goal(s)/cut score(s) – or if the student is well below grade level – this could be based on the specific ROI for that student
Measurement Strategy:
- Who: the person who will be progress monitoring
- With What: what the team has decided to progress monitor with; must measure the identified area of concern
- How Often: how often will the progress monitoring take place; usually twice each month for tier 2
- Review Date: set for a date when you will have at least 3-4 data points to review for that student
look at how often Progress Monitoring will take place to determine date)
![]()
The next section should not be completed until the team reviews progress monitoring data and makes a data-driven decision on next steps.
Click “Save” at the bottom of the Tier 2 Student Learning Plan.
Tier 3
Filter to the appropriate school, grade, and teacher.
Click on the specific area of concern for the student to enter the student’s file.
This should be highlighted in yellow to indicate the students has already been identified in Tier 2 for the specified area.
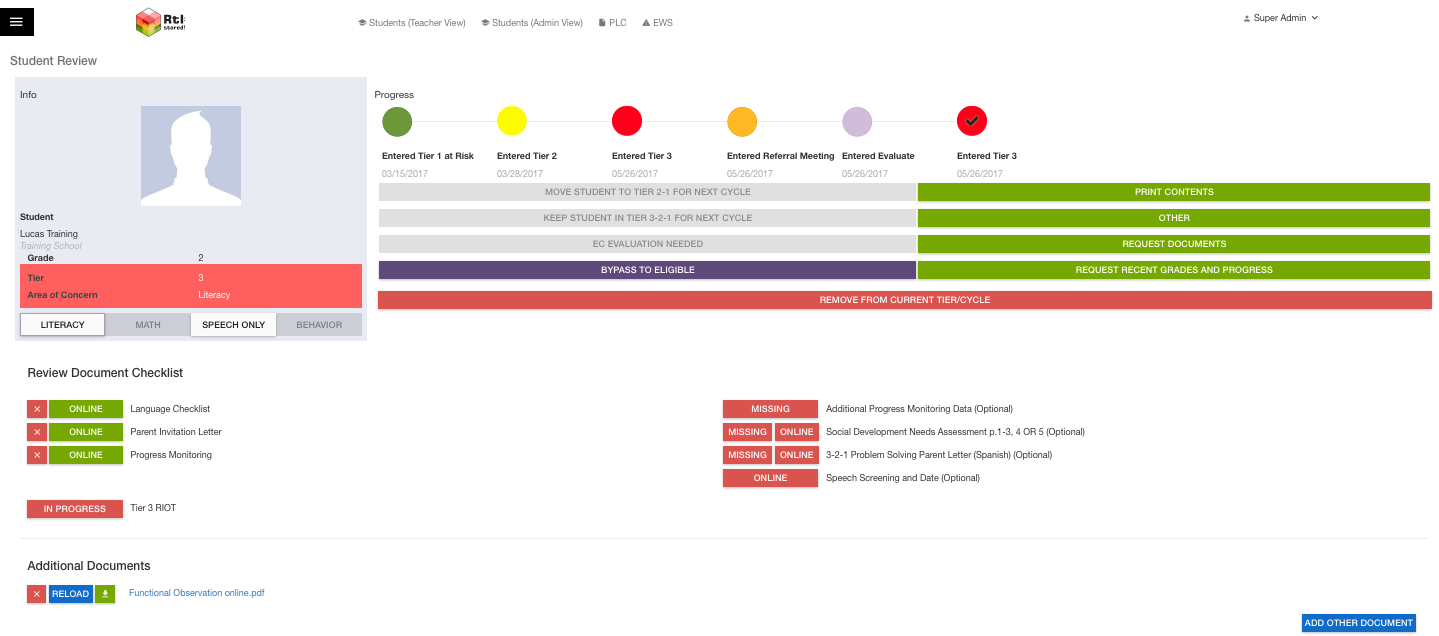
In the student’s file, ensure the appropriate documents are completed under “Review Documents Checklist”:
When all documents have been completed/uploaded, click the red “Move Student to Tier 3-2-1 for Next Cycle”:
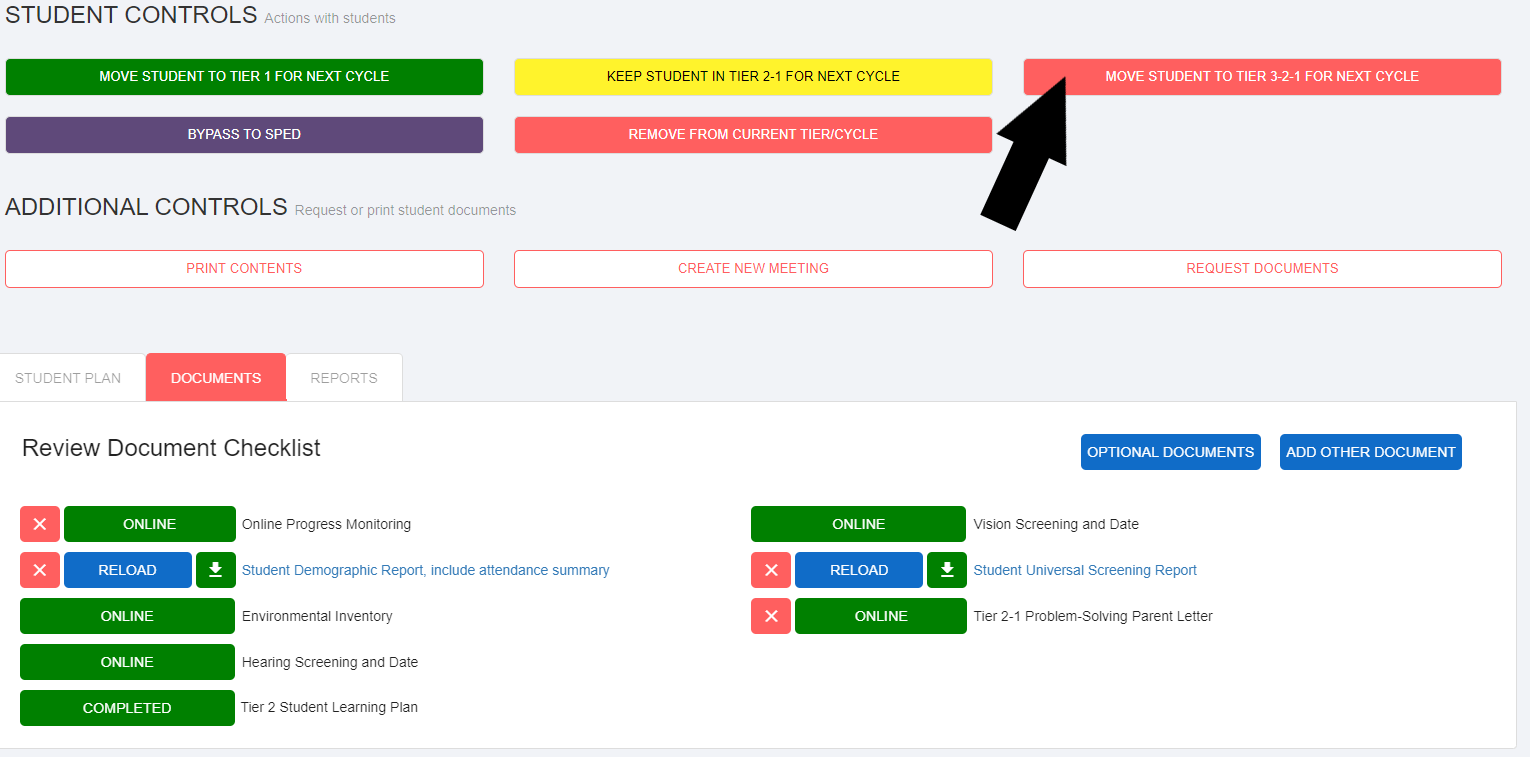
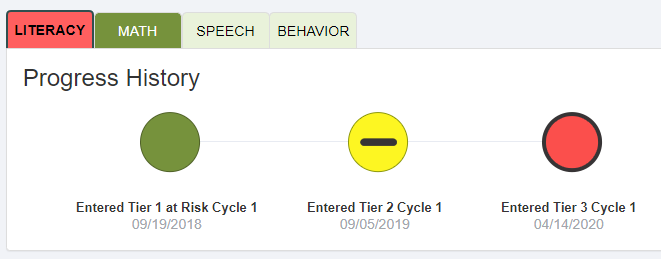
After the student is moved, the next tier will be added in the student’s timeline.
Tier 3 Documentation
Requirements for documentation are set by your district and will vary accordingly.
All documents must be uploaded/completed individually since students at Tier 3 are being problem-solved individually.
To upload documents, follow the same process described above.
Tier 3 Learning Plan
or additional support. see examples in the Guided Tiered Plans section in the back of this Success Guide.
The majority of the Tier 3 Plan will pre-populate from Tier 2 since you are increasing the level of support.
Ensure the following sections are completed:
General Information
What should our students know and be able to do?
PLC Instructional Expectations
Develop and Implement Action Plan
Who: this is who is going to implement the intervention(s)
What: identify the specific intervention(s)
Where: specific location the intervention(s) will be implemented (classroom #__; resource room; during intervention/enrichment block; SMART lunch; etc.)
How Often: # of days per week/# of minutes per session
Measurement Strategy
Who: the person who will be progress monitoring
With What: what the team has decided to progress monitor with – must measure the identified area of concern
How Often: how often will the progress monitoring take place (standard rule of thumb – students in the yellow should be PMed at least 2 times per month; students in the red should be PMed at least 1 time per week)
Review Date: set for a date when you will have at least 3-4 data points to review for that student (look at how often Progress Monitoring will take place to determine date)

The next section does not get completed until you are reviewing progress monitoring data and making a data-driven decision on next steps.
Click “SAVE” at the bottom of the Tier 3 Student Learning Plan.
Move to Referral Meeting
This meeting would be necessary if Tier 3 progress monitoring data does not show adequate growth as determined by normed target scores or ROI .
This meeting may also be necessary in the case of a parent referral.
When all required documents are completed/uploaded for Tier 3, you are able to move a student to referral meeting.
Click the “Move Student to Referral Meeting for Evaluation”.

You will be prompted to schedule a referral meeting by entering the following information:
Meeting name
Meeting date
Meeting time
Meeting participants
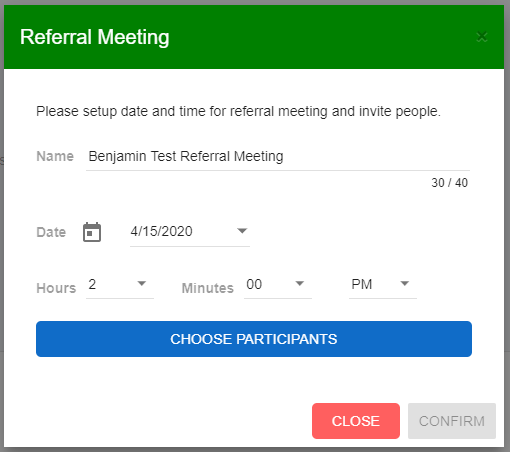
Click “Confirm”.
An email invitation will be sent to participants with meeting details.
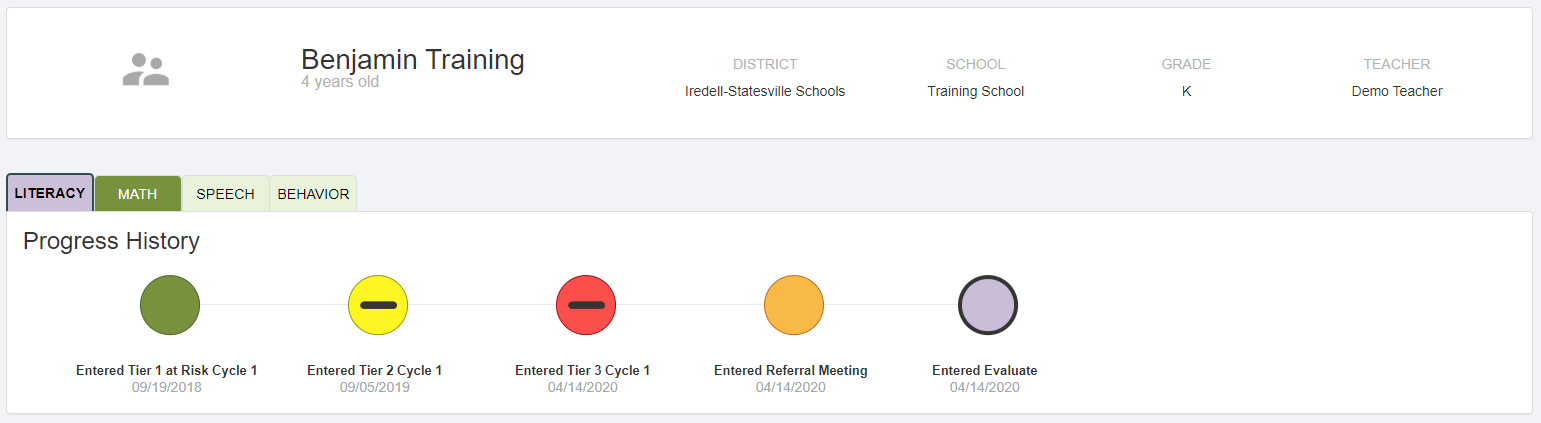
The scheduled meeting will appear in the student’s timeline:
Referral Meeting Decision
There are two options beneath the student’s date stamped timeline:
- Decide to Evaluate: This will move the student to the evaluation process.
- Decide NOT to Evaluate: This will move the student back to Tier 3 to continue providing support at the intensive level.
Move to Evaluation
The decision to move to evaluation will be displayed in the student’s date stamped timeline in dark purple:

The “Review Document Checklist” will contain specific items identified by your district/school.
Identify missing or incomplete documents and upload or complete them in the student’s file.
Eligibility
These are the 2 choices when a student is in the Evaluation phase
![]()
- If the student is determined eligible for special education services then during the eligibility meeting, a team member would click “Eligible” in the student’s file.
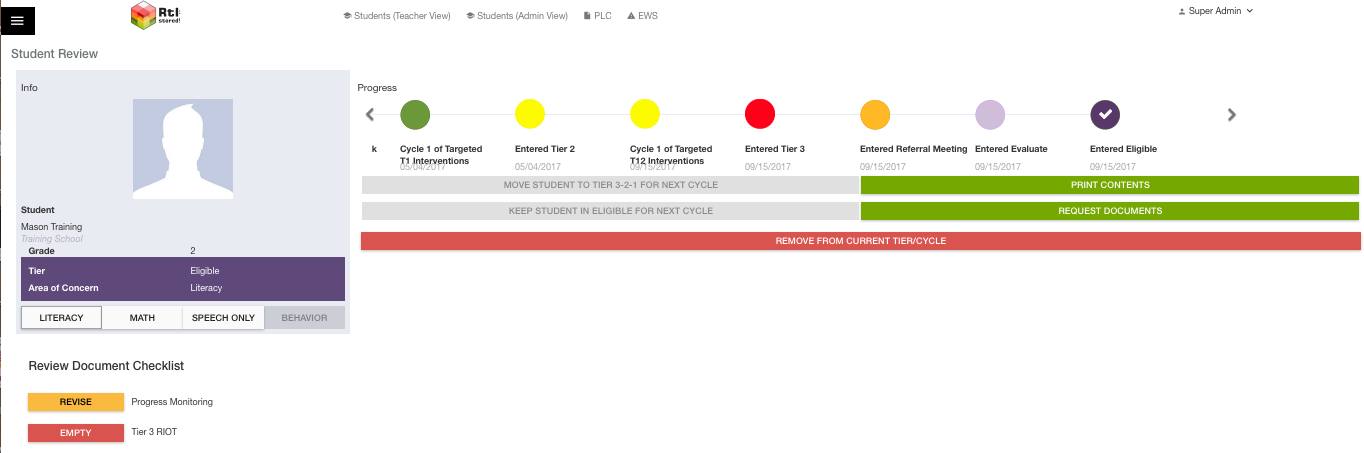
- If the student is found NOT eligible for special education services then during the evaluation meeting, a team member would click “NOT Eligible” in the student’s file.
If a student is found NOT Eligible, they are automatically returned to Tier 3 in the platform.